This tutorial shows how to examine the aerodynamic characteristics of the NACA0012 airfoil, calculating lift, drag, and moment coefficients at various angles of attack for a comprehensive understanding of its performance.
We are following the typical SimScale workflow:
- Prepare the CAD model for the simulation;
- Create the mesh;
- Set up the simulation;
- Run the simulation and analyze the results.
1. Prepare the CAD Model and Select the Analysis Type
1.1. Open a ‘New Project’ & import the CAD model
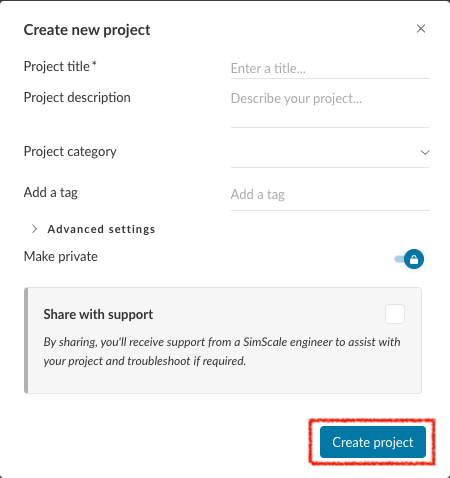
- Click open the new project, and fill the details as following dialogue box appears.
- Once details are entered, Click ‘Create Project‘.
- Click + next to GEOMETRIES, and import the NACA0012 CAD model
- Upload the pre-generated mesh in the similar manner.

1.2. Create Simulation
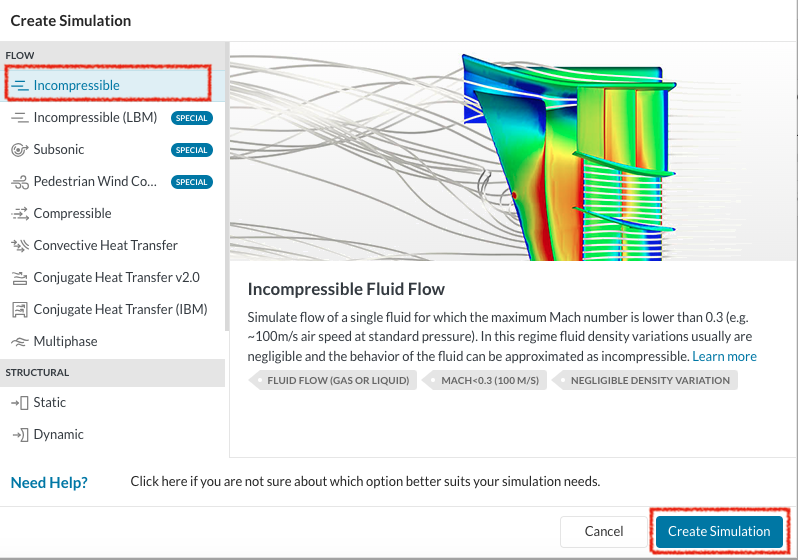
- Select ‘Incompressible’ and click Create Simulation
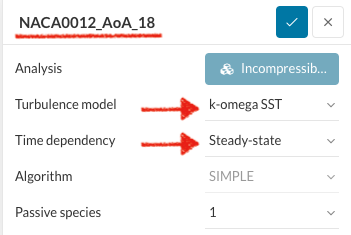
- Once the Simulation has been created, you can rename it and edit the characteristics as shown here.
- Set the Model parameters as given.

2. Assigning the Material and Boundary Conditions
2.1 Define a Material
2.2 Define Boundary Conditions
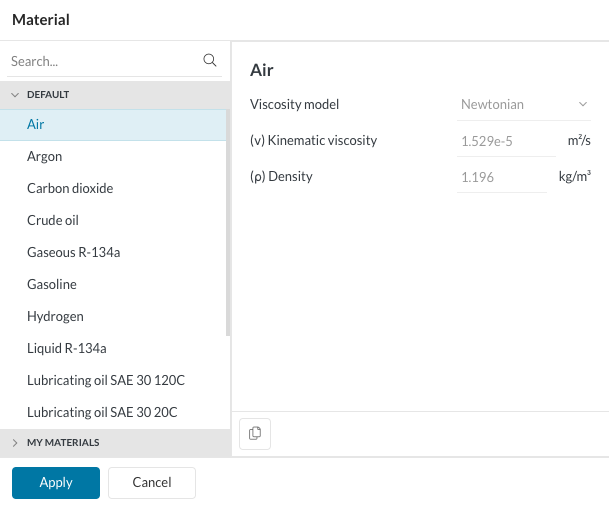
- Select ‘Air’ by clicking ‘+’ next to ‘Material’.
- To set up the ‘Boundary Conditions’, enter the values as given in the snippets.
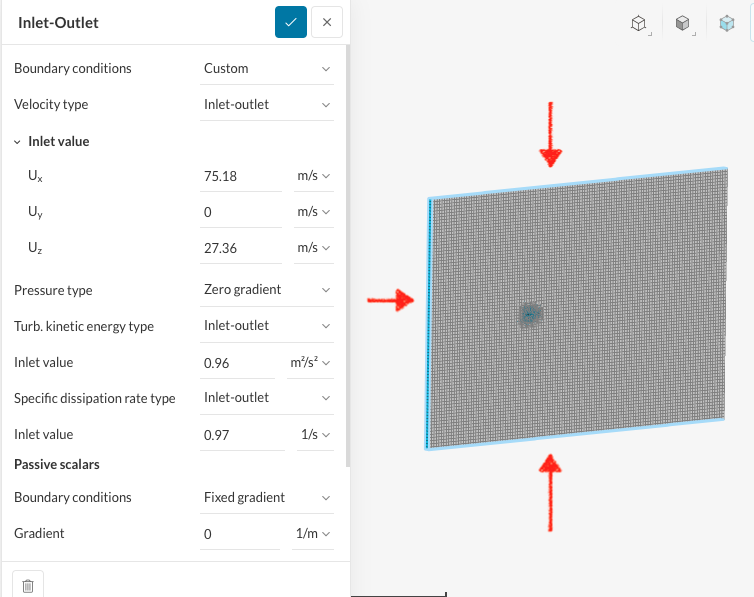
- Set the ‘Inlet’ boundary condition.
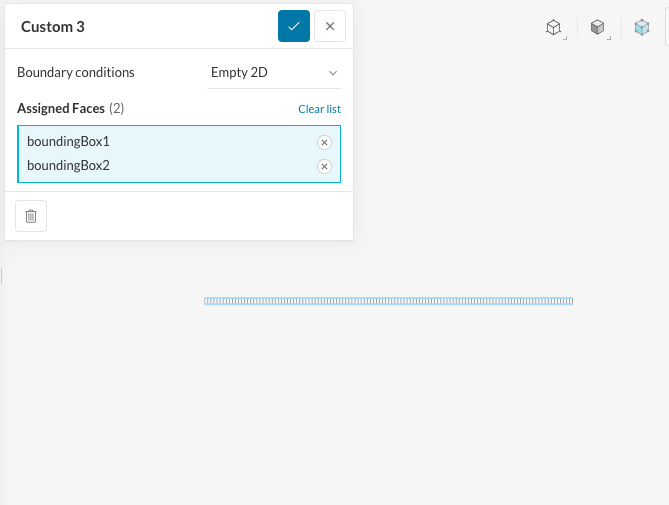
- To set the symmetry for 2D geometry, select Empty 2D.
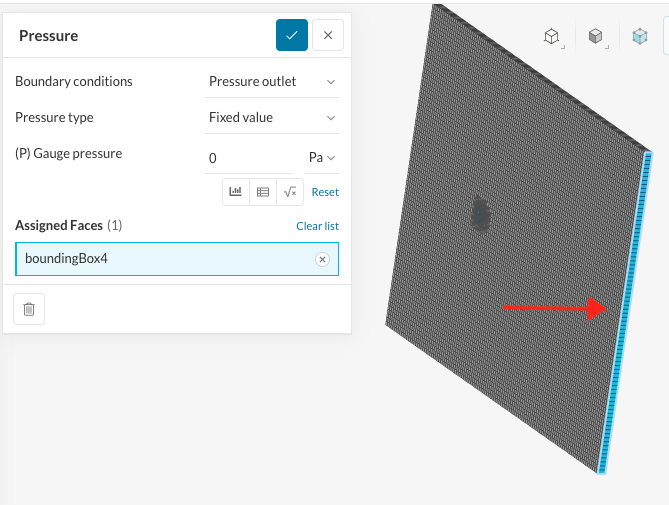
- To set the boundary condition for ‘Outlet’.
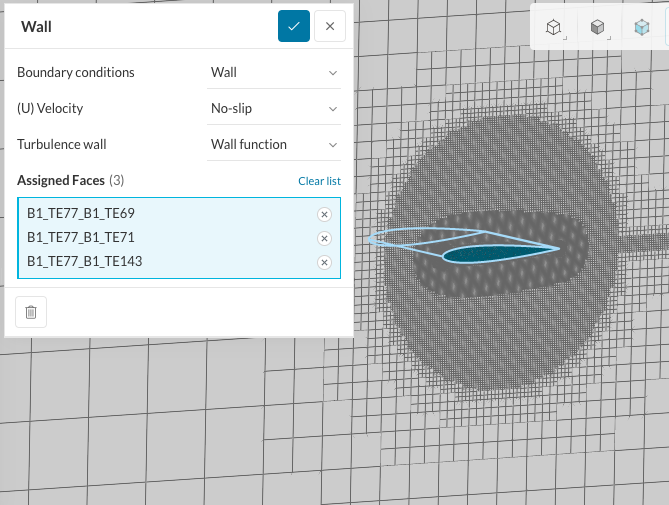
- To set the boundary condition for ‘Wall’.
2.3. Simulation Control & Result Control
- Set the ‘Numerics’ & ‘Simulation Control‘ as given in the ‘FINISHED PROJECT’.
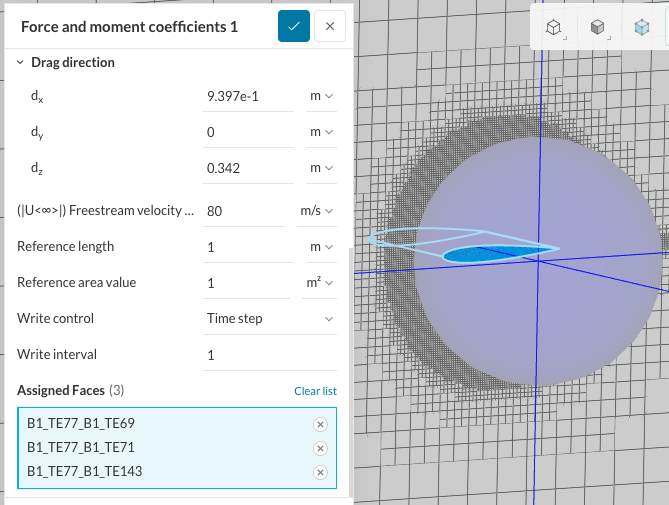
- Now, it’s time to set up the ‘Force and moment coefficients‘ by clicking ‘+’, and enter the following values.

- Click ‘+’ next to ‘Simulation Runs‘, and ‘Run‘.
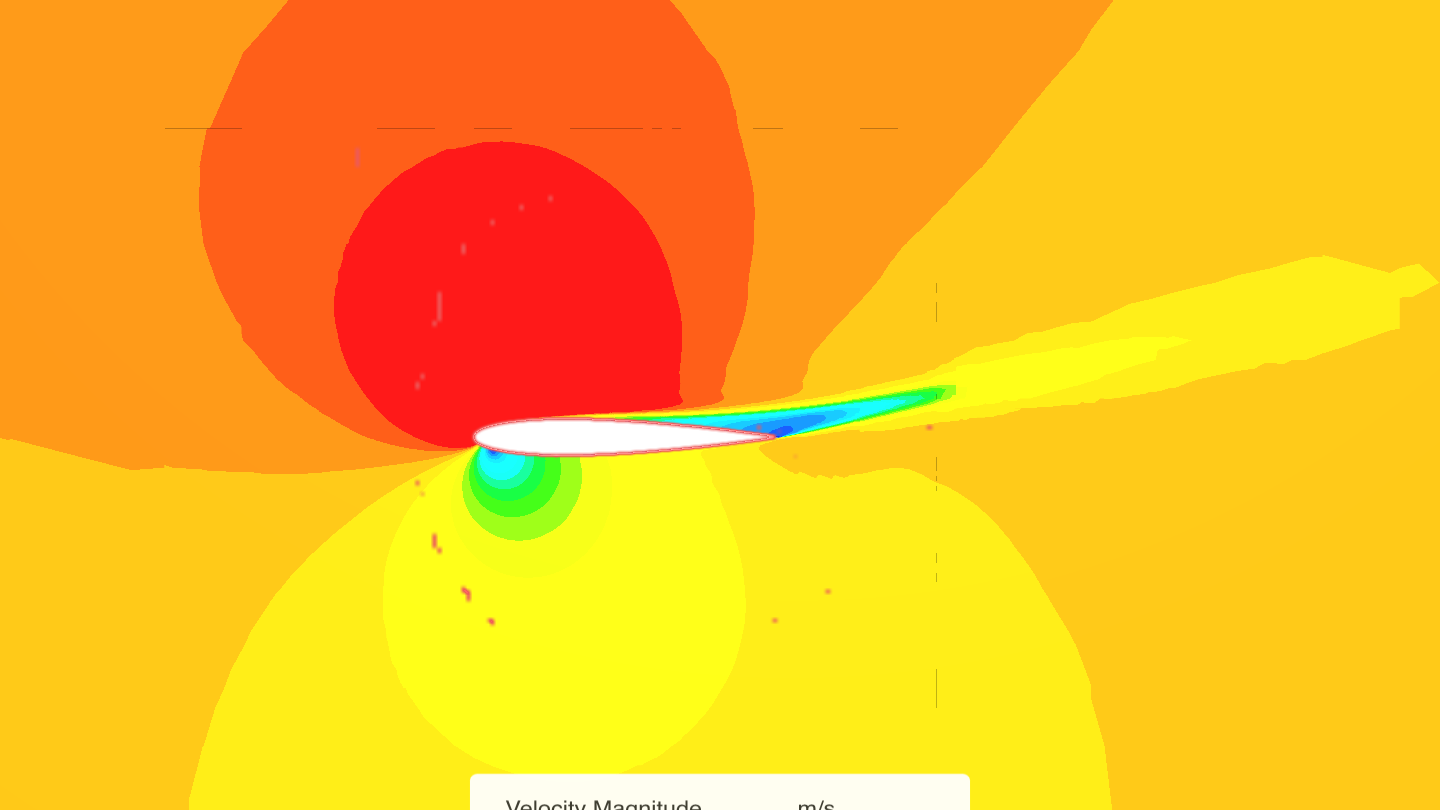
3. Post-Processing
- Once the simulation is ‘Complete‘, you can access the post-processing environment by clicking on ‘Solution Fields’ or ‘Post-process results’.